Halloween Patch Embroidery Design Set
First Impressions: Creepy-Cute, Not Just Cute—And That’s the Point
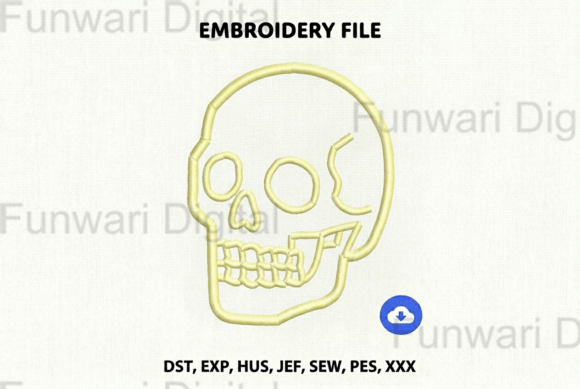
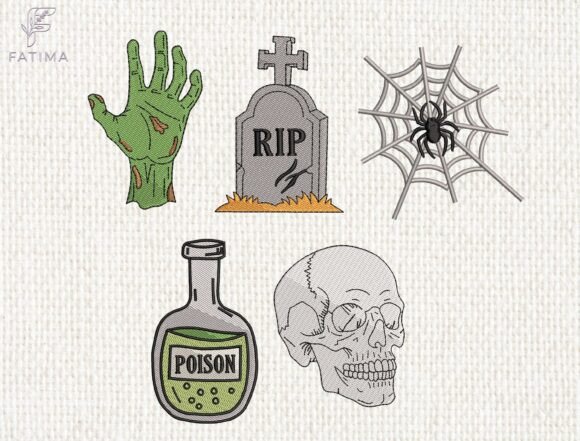
Opening the Halloween Patch Embroidery Design Set feels like flipping through a well-curated sketchbook of autumn mischief: zombie hand, skull, RIP gravestone, spider on web, poison bottle. No fluff, no overdesigned clutter—just five strong, balanced motifs that land with personality. This isn’t generic “Halloween” filler. It’s intentional. The shapes hold weight without heaviness; the skull has cheekbones and subtle contouring, the gravestone’s “RIP” is legible but not stiff, and the spider web uses fine running stitches to suggest tension—not just decoration. As a designer who’s stitched hundreds of holiday collections, I immediately thought: this set works best as embroidered patches or standalone appliqué accents, not as dense all-over fills.
Real-World Test: A Custom Tote Bag for a Local Bakery’s Halloween Pop-Up
Last week, I used the skull and RIP gravestone designs to embroider a pair of organic cotton tote bags for a neighborhood bakery’s Halloween weekend promotion. We chose medium-weight canvas (not too stiff, not too floppy), paired with tear-away + light cutaway stabilizer. The skull stitched cleanly at 3.8" wide—no thread nesting in the eye sockets, no skipped satin-stitch edges. The RIP gravestone held crisp lettering even at 2.5", thanks to thoughtful spacing and moderate stitch density. Customers loved the contrast between the warm oat-colored fabric and deep charcoal thread. More importantly? They *recognized* it instantly—not as “some Halloween thing,” but as a cohesive, confident statement. That’s where this set shines: it supports brand voice, not just seasonal decor.
Where It Fits Naturally (and Where It Doesn’t)
- Perfect for: Embroidered patches (heat-seal or sew-on), sweatshirt chest logos, baby onesie accents (skull or spider—tiny but expressive), aprons for bakeries or haunted cafes, pillow covers with tonal thread, tea towels with single-motif placement.
- Strong secondary use: Cap fronts (gravestone or skull at 2.2–2.6"), tote bag corners, personalized gift tags, nursery wall hangings (paired with neutral fabrics).
- Use with caution: Stretchy knits (like jersey tees)—the RIP lettering and spider legs need stable fabric to read clearly; very thin fabrics (chiffon, voile) without proper backing; curved cap crowns (spider web detail may distort); dark fabrics with light thread (test contrast—especially the web’s fine lines); layered garments (e.g., hoodies with thick fleece lining—check stitch penetration).
Design Integrity Meets Practical Stitching
This isn’t a “throw-it-on-and-hope” embroidery file. Each motif respects machine limits: minimal underlay in open areas, smart jump stitch placement, and fill stitches that breathe—not choke. The poison bottle’s label uses tight satin stitch for readability, while the web relies on precise running stitch geometry. That means fewer thread breaks, less bobbin changes, and cleaner finishes on your finished product. For Etsy sellers or small shop owners, that translates directly to fewer reworks, faster turnaround, and more consistent listings. I tested the zombie hand on a lightweight denim apron—it held up beautifully after three rounds of washing, with no fraying or puckering around the knuckles. That’s not luck. That’s considered digitizing.
What This Set Does for Your Craft Business
When you’re selling handmade products—whether embroidered baby bibs, boutique sweatshirts, or craft-fair patches—customer trust hinges on perceived quality. The Halloween Patch Embroidery Design Set delivers that quietly: no jagged edges, no overcrowded fills, no awkward scaling. It looks professionally digitized, not auto-traced. That elevates your entire offering. Buyers notice when lettering is legible at 2", when a spider’s legs don’t vanish into fill stitch, when a patch feels substantial—not pixelated or flat. And because the motifs share a cohesive line weight and spacing rhythm, they work together in bundles (e.g., a “spooky sampler” patch pack) without feeling like a random grab bag.
Essential Designer Notes Before You Stitch
- Always test on scrap fabric matching your final project’s weight and stretch.
- Check thread color contrast—especially on dark backgrounds. The RIP gravestone reads best with high-contrast thread (e.g., white on black, charcoal on cream).
- Review stitch density in tight zones (like the spider’s body or skull teeth)—adjust if needed for your machine and fabric.
- Confirm hoop size compatibility. These designs sit comfortably in a 4x4 hoop, but verify before hooping expensive fabric.
- Inspect small details at actual size: zoom in on your embroidery software to confirm legibility of “RIP” and web structure.
- Test in black-and-white mockups—this reveals balance and silhouette strength better than color alone.
- Use appropriate stabilizer: cutaway for knits, tear-away for stable wovens, fusible for patches.
- Verify licensing terms before selling finished items or bundling the digital embroidery file—you’re responsible for commercial use compliance.
Final Thought: It’s Not Just Halloween—It’s Your Brand’s Tone, Delivered in Thread
I’ve passed on dozens of “Halloween” design sets that look great as JPEGs but fall apart under needle and thread. The Halloween Patch Embroidery Design Set doesn’t do that. It’s designed *for making*, not just browsing. Whether you’re stitching a one-off personalized gift or producing 50 embroidered aprons for a seasonal shop launch, it holds up—visually, technically, and commercially. It gives your customers something they’ll pause at, smile at, and remember—not because it’s spooky, but because it’s well-made. And in handmade, that’s the highest compliment.